Raspberry Chocolate Slices

12 Jul

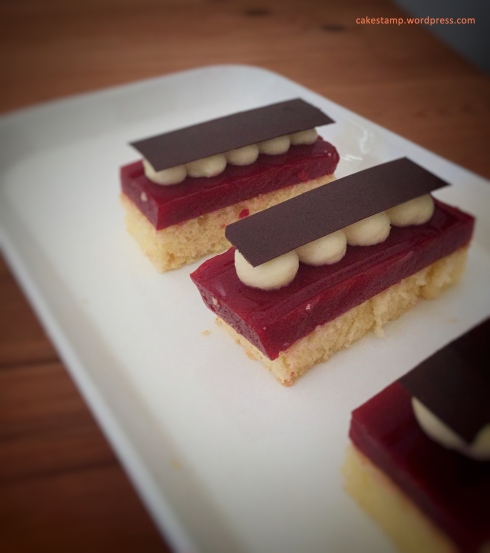
I adopted the recipe from the French chef Philippe Bertrand. The end results are far from perfect. First of all the bottom layer was supposed to be coconut dacquoise, but my dacquoise was too dry. I ditched it and whipped up a quick sponge cake instead. Secondly the chocolate slices were too thin so the chocolate flavor was lost compared to the prominent raspberry flavor.

I have to mark down my biggest achievement here – my first tempered chocolate wasn’t a total failure. Although I didn’t get the thickness of the chocolate slices right, I managed to tempered it correctly so it was glossy and crispy. Honestly tempering chocolate was a long process, I either made it too hot or too cold so I had to start all over again for a few times. I felt a sense of relief when I finally got the temperature right.

These slices had a perfect flavor and texture profile – sweet and creamy from the white chocolate ganache, tart and soft from the raspberry jelly, bitter and crunchy from the dark chocolate. It was very enjoyable to eat them. One day will make these again and also try to perfect them!

Raspberry Jelly

  • 220g raspberry puree
  • 14g lemon juice
  • 33g caster sugar
  • 6g gelatin powder
  • 30g water
  1. Bloom the gelatin in the water.
  2. Mix the raspberry puree, the lemon juice and the sugar in a sauce pan and heat up until it is boiled. Turn off the heat and add the bloomed gelatin, stir until it is completely dissolved.
  3. Let it cool down to 30C . Pour the mixture into the 15x15cm square mousse ring (put a silicon mat or a baking sheet underneath), let i firm up.

White Chocolate Ganache

  • 200g cream, divide into 2 parts, 100g each
  • 2g gelatin powder
  • 10g water
  • 45g white chocolate
  1. Bloom the gelatin in the water.
  2. Heat up 100g cream in a sauce pan, add the bloomed gelatin and stir until it is completely dissolved.
  3. Put the white chocolate in a bowl. Pour the mixture in the bowl, stir until the white chocolate is dissolved.
  4. Add the remaining cream. Refrigerate until the mixture cools down to 4-5C.
  5. Whisk the mixture until it is fluffy.

IMG_5055

Mango Pâte de Fruits

25 Jun

Although this is not baking related I still want to share. Pâte de Fruits are french sweets. They are made from fruit puree, hence they could be different colours. Each bright colour cube covers with sugar, how can you resist?

It was my first time to make these. Honestly they weren’t perfect because I didn’t cook long enough and they still contained too much water content, as a result the texture was too soft. Again a lessen learnt – be patient, be patient and be patient! Here I used mango puree, but you can use any other fruit puree in the same quantity. Warning: they contain high level of sugar, so don’t eat too many!!! 🙂

Mango Pâte de Fruits

  • 500g mango puree
  • 12g pectin
  • 500g+50g caster sugar, plus more for coating
  • 100g honey
  • 40g lemon juice
  1. Line a baking tray with a piece of baking paper or a silicon mat. Put a 27cm x 14cm rectangle mousse ring on top.
  2. Heat up the mango puree in a sauce pan to 50℃.
  3. Mix the pectin and 50g sugar, add to the mango puree. Continue to cook it until it is boiling and cook for another minute. Add 550g sugar and cool until it is boiling. Add the honey and cook until the mixture reach 107℃.
  4. Turn off the heat and add the lemon juice and mix well. Pour the mixture into the prepared mousse ring. Leave it completely cool down at room temperature.
  5. When it is firm up, put some sugar on top so it is not sticky and it is easier to cut. Remove the mousse ring, use a knife to cut the pâte de fruits into 3cm x 3cm cubes. Coat them with sugar.

IMG_5043

Blueberry and Lemon Cake with Crumble Topping

11 Jun


I like apple crumble but I have never tried to put the crumble on a cake. When I saw this recipe I couldn’t wait to try it. It packs all my favorite ingredients into a cake – blueberries, lemon and crumble. (Oh cake is my favorite too!)

The result didn’t disappoint me. The cake was very lemony. The blueberries burst in my mouth with sweetness and slightly tartness. The cake was smooth and the crumble was crunchy. In my opinion the  highlight is the crumble. It was a little bit salty but surprisingly the saltiness added another depth of flavor to the cake, so don’t skip the salt!

Last but not least make the crumble first because it needs time to rest. This is a great make ahead cake. Actually it tastes even better over night. 🙂

Crumble topping

  • 60g plain flour
  • 60g almond meal
  • 60g caster sugar
  • 60g unsalted cold butter
  • 3g salt
  1. Mix all the ingredients except the butter in a bowl.
  2. Cut the cold butter into small cubes.
  3. Rub the butter into the flour mixture. Use hands to knead all the ingredients into a dough, but don’t over work the butter. Should keep the butter in small chunks.
  4. Wrap the dough with cling wrap and refrigerate for a least 1 hour.

Cake

  • 300g plain flour
  • 10g baking powder
  • 260g caster sugar
  • 3 lemons zest
  • 170g unsalted butter, room temperature
  • 3 eggs, room temperature
  • 90g milk
  • 70g cream cheese
  • 100g blue berries (fresh or frozen)
  1. Preheat the oven at 180C. Line the baking tray (I use a 20x9cm loaf pan) with baking paper.
  2. Beat the butter, sugar and lemon zest together until it is creamy..
  3. Sift the plain flour and baking powder together in a bowl. Mix the cream cheese and milk together in another bowl, warm it up to the room temperature in the microwave (heat up for 10 seconds, stir and heat it up for another 10 seconds until the cream cheese is soft and breaks into small chunks).
  4. Add 1/3 of the flour mixture to the egg mixture, alternate with the milk mixture. Mix with a spatula after each addition of the dry and wet ingredients. Fold in the blueberries at last.
  5. Pour the batter into the baking tray, top with the crumble (I found it is easy to grate the cold dough with a grater).
  6. Bake for 60-70 mins o until the inserted skewer comes out clean.


IMG_5017IMG_5016

Dark Chocolate and Hazelnut Brownies

5 Jun

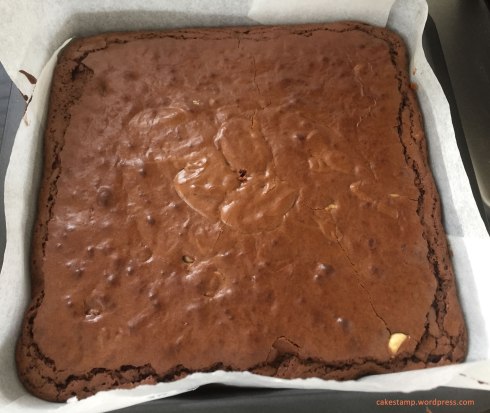
If you are a fan of chocolate or if you want to indulge yourself with chocolate try these dark chocolate and hazelnut brownies. This recipe uses half kg dark chocolate – OMG chocolate overload! The brownies are so rich and moist. Hazelnuts give them a crunchy texture. Chocolate and hazelnuts are a perfect match. I don’t need to say anything else, find the recipe below! 🙂

Dark chocolate and hazelnut brownies

Make two 8 inch square brownies

  • 510g dark chocolate (I used 50%, you can get 60-70% if you like the bitter flavor)
  • 240g butter
  • 6 Eggs
  • 400g brown sugar
  • 225g Plain flour
  • 15g baking powder
  • 125g hazelnut, roasted and coarsely chopped (don’t chop them too fine otherwise you will lose the crunch texture)
  1. Preheat the oven at 180C. Line two 8 inch square baking trays with baking paper.
  2. Whisk the egg and brown sugar until it is thick and creamy.
  3. Melt the dark chocolate and butter in a sauce pan, stir until they are completely dissolved. Remove from heat.
  4.  Gradually add the chocolate mixture to the egg mixture in 3 batches. Mix well between batches.
  5. Sift the flour and baking power in a separate bowl. Gradually add the flour mixture into the batter in 2 batches. Mix well between batches until the flour is completely incorporated in the batter.
  6. Add the hazelnuts into the batter and mix. Divide the batter into the prepared baking trays. Each tray should have about 1cm thick batter.
  7. Baking in the oven for about 30 mins, or until the top surface crusts and if touch with a finger brownie is springy and moist.

IMG_4993IMG_4992

Animal Cookies

12 May

Today I made some animal cookies for the Mother’s Day afternoon tea at my daughter’s daycare. Since it is a kid’s place, I decided to make some animal cookies that are attractive to kids (although any cookies are always attractive to kids!). I had a sense of achievement when I received a few compliments. I must say they do look very cute! 🙂

Honestly the cookies were not perfect. The piggy nose was not in the center. Some pig ears came off. Anyway I am going to put the steps here and a few notes that I learnt from my mistakes.
IMG_4914

The cookies recipe is from Karen’s Cookies. It is very easy to make and the cookies don’ spread. It is perfect for cut out cookies. Taste wise, the cookies are buttery, soft and melting in the mouth.

Basic cookie dough

  • 227g butter, softened
  • 1 cup icing sugar
  • ½ tsp salt
  • 1 large egg
  • 1 large egg yolk
  • 2 tsp vanilla extract
  • 2 ½ cups all-purpose flour

Cream butter, sugar and salt until light and fluffy, about 3 minutes with mixer set at medium speed. Add yolk, beat well. Add whole egg, vanilla extract and beat until well-incorporated. Add flour; beat at low speed just until flour is mixed in; do not overmix. Divide dough in halves or thirds and wrap in plastic wrap. Refrigerate until firm, at least one hour and up to 2 days.

Because I was making 2 animals so I divided the dough in half for each animal  and colour them respectively before I refrigerate it.

For the bear: I divided the dough again – 1/3 as plain and add 1½Tbsp coco power to the rest of the dough and mix well.

For the piggy: left 2/3 dough in plain and add a few drop of the pink food color into the rest of the dough and mix well.

To make the bear

Roll 2/3 of the chocolate dough into a long log, about 2 cm diameter. Roll the rest into 2 small long logs, same length as the first log. Use a wooden dowel or something similar to make 2 indentations at 2 sides of the top half of the big log (for the ears to sit in nicely). Push the 2 small logs into the indentations (at this point if the dough become too soft, put the entire log in the fridge or freezer until it firms up).

Reserve a small amount of plain dough and roll it into a small log, this is to make the nose. Roll the rest of the plain dough into a rectangle sheet, big enough o wrap around the logs. After wrap it, slightly push the plain dough against the chocolate log, make sure no gap around.

Freeze it for about 20 mins or refrigerate it until it is firm. Cut it into about 0.5 cm thick. Cut the small plain log into small discs and stick them on the bear face. I used black food colour to draw the eyes and nostrils (or you can use melt chocolate to draw after baking).

To make the piggy

Roll the pink dough into 1 big log and 2 small logs, in same length.

Roll the plain dough into a thick rectangle, big enough to wrap around the big pink log. Because the nose should be close to the bottom half of the face, the plain dough should wrap around the pink log 1.5 times, make sure no gap around.

Use the wooden dowel to make 2 indentations like the bear above. Push the small pink logs into the indentations and make sure they sick to the face nicely.

Refreeze it for about 20 mins or refrigerate it until it is firm. Cut it into about 0.5 cm thick. I used black food colour to draw the eyes and nostrils (or you can use melt chocolate to draw after baking).

Bake the cookies in the oven for 15-20 mins or until they are cooked.

Notes:

Measuring the right size is important. Make sure the plain dough is big and thick enough to wrap around. Because I didn’t get the size right, I rolled the dough for a few time and I added some flour on the working bench to prevent it sticky each time. Eventually the dough was dry, it didn’t stick well. There were gaps around and some cookies even cracked after baking.

If the ear comes off after baking (oops!) you can use some buttercream or melt sugar to glue it on again.
IMG_4915

Once you know the basics, you can create your own animals, e.g. cat and bunny can be similar to the bear but the ears are in different shapes!

Boiled Orange Chocolate Cake

24 Mar

The other day my mother in law told me she made a boiled orange chocolate cake and it was delicious. She had a piece of cake each day and she didn’t want to finish it. My mother in law is dairy intolerant and gluten intolerant. Therefore she doesn’t eat cake often but when she does eat then the cake must be a bomb. I immediately thought that’s something I must try!

This recipe came from a baker named Eleanor Ozich. The original recipe called for 2 cups ground almond. However I was short of ground almond so I mixed 3/4 cup group almond and 3/4 buckwheat flour together. It is still gluten free and delicious. I think you can substitute ground almond with any other ground nuts or gluten free flour or even plain flour, but you might need to experiment with the quantity because different ingredients have different absorption.

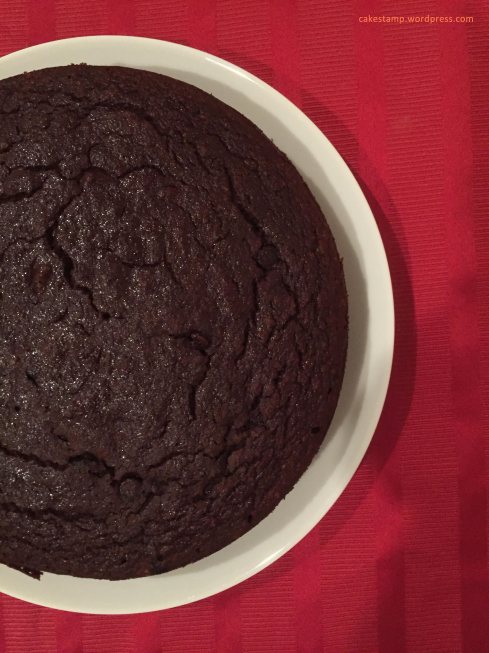
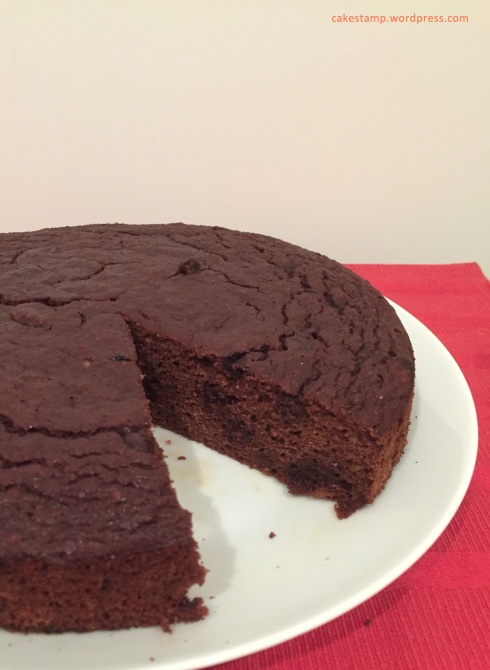
The cake was super moist, rich and fragrant. It had just the right amount of sweetness balanced by the bitterness from the orange peel and dark chocolate. If you have a sweet tooth you might wish to add more honey. Happy baking!

Boiled Orange Chocolate Cake

  • 2 oranges
  • 3/4 cup ground almonds
  • 3/4 cup buckwheat flour
  • 4 heaped Tbsp good quality cocoa
  • 5 heaped Tbsp honey
  • 5 free-range eggs
  • 1 tsp vanilla extract
  • 1 tsp baking soda
  • 1 cup good quality dark chocolate chips (optional)
  1. Place whole oranges in a large saucepan and cover with water. Bring to the boil and boil for one hour.
  2. Drain, then allow to cool.
  3. Set the oven to 160C. Grease a cake tin with butter or coconut oil.
  4. Cut oranges in half and place in a food processor (skin, pith, flesh and all). Process until smooth. Add remaining cake ingredients and process again until smooth. Fold the chocolate chips into the batter with a spatula.
  5. Pour the batter into the prepared cake tin and bake for 50-60 minutes or until a skewer comes out clean.
  6. Allow cake to cool completely before removing from tin or it may break.
  7. Dust with cocoa if desired.

IMG_4748IMG_4752

Animal Birthday Cake

20 Mar

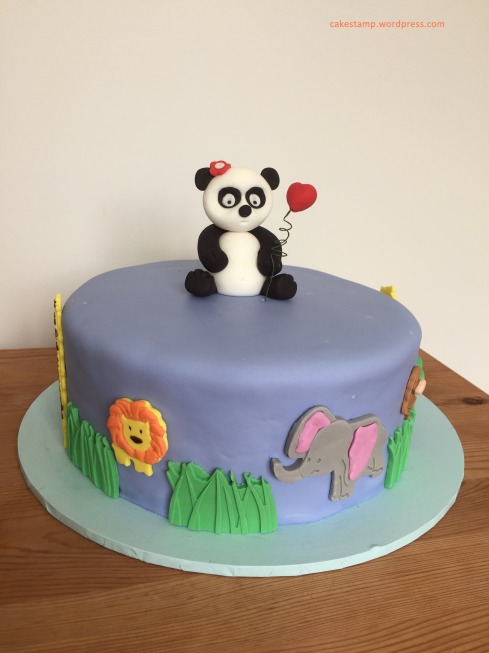
When I first learnt cake decorating, I imaged I would create a birthday cake for my own child one day. Recently my daughter turned 2 and I was so excited to make this cake for her!

Ellie is very interested in animals. She can name a few different animals and imitate their sounds. Since I’ve introduced pandas to her on YouTube videos, pandas become her favorite animal. One day I will take her overseas to see the real pandas (there are no pandas in the local zoo).

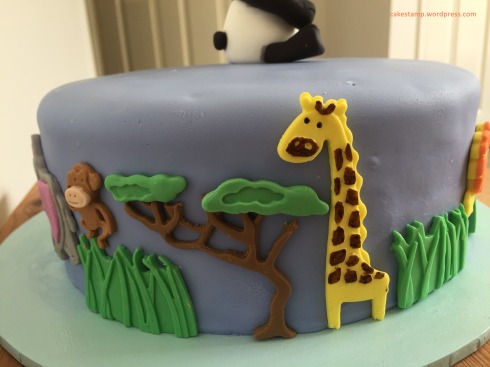
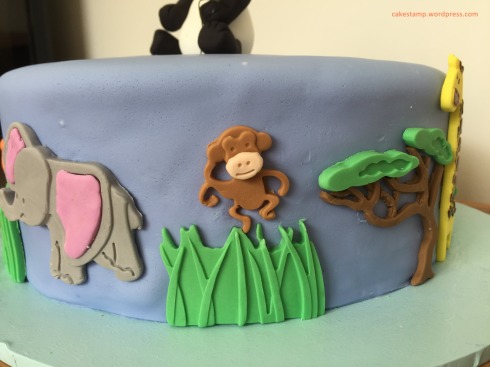
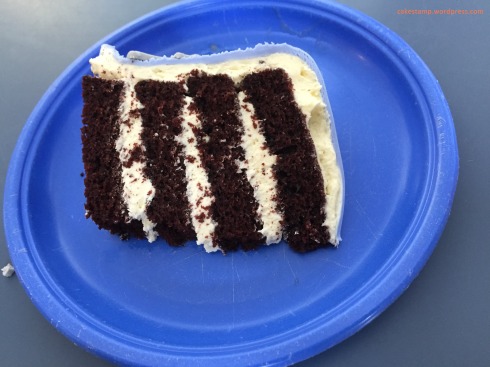
This is a 4 layer chocolate cake covered with fondant. I also use fondant to make all the decorations. Ellie was amazed by the cake although she didn’t quite understand the concept of birthday yet. 🙂  The smile on her face was my best reward!

IMG_4675IMG_4678IMG_4686IMG_4701


Edible Potted Moss

26 Feb

Honestly I had been planning this dessert for years. The idea was first planted in my head when I watched the TV show of Heston Blumenthal making potted plant Tiramisu a few years ago. At the time Heston’s recipe was intimidating for me. I didn’t even think to try it. Last year when I saw the flower pot ramekins in the shop, Heston’s creation came back to my mind again. I bought the ramekins and thought I would put them to use one day. After that I didn’t have a clear idea of what I was going to make, also because I didn’t have much time, I put the ramekins in the cupboard and forgot about them completely. Until recently I bought a new toy – whipping siphon gun, a clear idea was formed in my mind and I finally decide put it into action.

My idea was to make a dessert with elements – chocolate mousse, chocolate soil and matcha sponge. I started searching recipes for those elements. Because the idea was inspired by Heston I particularly looked for his recipes. To my surprise he only used water and chocolate to make chocolate mousse. I was intrigued by his recipe since I have learnt water will seize the chocolate. Water in the chocolate is always a big no-no. After I watched his video I decided to give it a go. The result was interesting – water didn’t seize the chocolate but created a smooth and creamy texture. However I am not sure if it is he chocolate I used or the ratio issue, my chocolate mousse wasn’t thick enough. Even tough I had been whisking it for a long time, the mousse was like the custard consistency. If you are interested please find his recipe here.

To make the chocolate soil I adapted Heston’s Tiramisu recipe and replaced some ingredients with something else that I can find. It was tasty and it can be added to any dessert for some texture.

Chocolate soil

  • 200g caster sugar
  • 80g dark chocolate, roughly chopped (70% cocoa solids)
  • 1/4 cup puff rice
  • 60g white chocolate
  • 20g cocoa powder
  • ½ tsp salt
  1. Put 75 ml cold tap water and the sugar into a saucepan and place the pan over a high heat. Bring to the boil and continue to heat until the syrup at the side of the pan begins to colour.
  2. Remove from the heat and immediately add the chopped dark chocolate. Whisk to incorporate, continue to whisk until the liquid has completely crystallised.
  3. Pour the dark chocolate crystals onto a baking tray lined with baking paper and allow to cool.
  4. To caramelise the white chocolate, preheat the oven to 190ºC. Place the white chocolate on a baking tray lined with baking paper and place in the oven for 15 minutes. After the first 5 minutes, begin to stir the chocolate every couple of minutes until fully caramelised. Remove it from the oven and let it cool. Don’t turn off the oven.
  5. Put the puff rice int a baking tray and toast in the oven until they are lightly brown with some nutty flavor.
  6. Blend the crystallised dark chocolate and caramelised white chocolate with the cocoa powder, toasted puff rice, and the salt in a food processor until they are crumbly.

Macha Sponge

  • 1 Egg
  • 40g caster sugar
  • 10g plain flour
  • 25g butter melt
  • 60g milk
  • 1/2 tsp matcha powder
  1. Whisk all ingredients together and put the mixture in the whipping siphon gun.Charge with the gas and shake vigorously. Leave it for 2 hours.
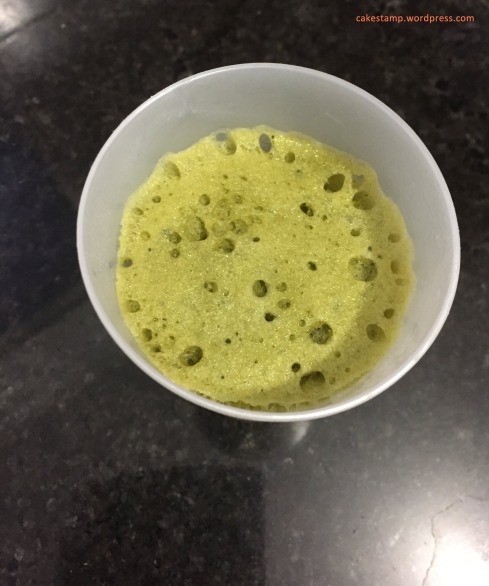
  2. Squeeze the mixture from the whipping siphon gun into a plastic or paper cup. Microwave it on high heat for 40 seconds. Take it out from the microwave and let it cool (the cakeshould be very airy  and spongy).

To assemble

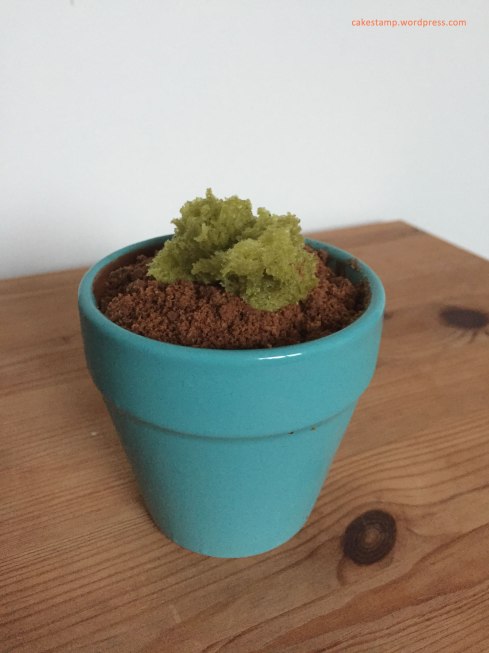
Chocolate mousse should be set in the ramekins in the fridge for a few hours. To serve, add the chocolate soil on top of the chocolate mousse. Tear a piece of matcha sponge and add it on top. Tadda does it look like a real moss plant? 🙂
img_4665img_4666

Earl Grey Tea Cake with Lemon Tea Icing

22 Jan

I drink tea but I don’t particular drink tea every day. Earl grey is my favorite black tea. Every time I drink it, its fragrance and unique taste still linger in the cup and in my mouth  afterward. I was super excited when I saw the recipe. I had never made tea cake before. The idea of using tea in baking excites me. The most exciting thing is this recipe comes from a professional french patisserie – Nicolas Pierot. I couldn’t wait to try it.

Now I can tell you the cake was amazing! Earl Grey is the hero of the cake, it shone through in every single crumb of the cake. It didn’t only make the cake smell nice but also taste nice. The cake itself wasn’t too sweet. The lemon icing added some sweetness and sourness to the cake- a perfect balance! The cake texture was light and smooth. Taste wise or texture wise this cake was perfect. I fell in love with Earl Grey again from head to toe. 🙂 I can’t recommend more so I’ll go straight to the recipe now.

Earl Grey Tea Cake with Lemon Tea Icing

By Nicolas Pierot

Cake

  • Caster sugar 270g
  • Egg 4
  • Earl grey tea leave 10g (good quality tea has a better taste)
  • Plain flour 230g
  • Baking powder 6.5g
  • Cream 120g
  • Unsalted butter 85g
  1. Preheat the oven at 160C.
  2. Grease the cake pan (25cm*12cm*7cm, or similar size) and dust with flour, or line the cake pan with baking paper.
  3. Mix the flour and baking power in a bowl, set aside.
  4. Beat the egg and sugar together until it is thick and creamy.
  5. Add tea and cream in a sauce pan and heat up. Add the butter and stir until it melts completely. Remove from heat.
  6. Sift the flour mixture into the egg mixture, mix well. Strain the tea mixture and add it to the flour and egg mixture, mix well but don’t over mix.
  7. Pour the mixture into the prepared cake pan and bake for 60-65 minutes or until the test skew comes out clean.

Lemon tea icing

  • Icing sugar 300g
  • Lemon juice 70-80g
  • Earl Grey tea bag 1(2g)
  1. Preheat the oven at 60C.
  2. Add the lemon juice and the tea bag in a sauce pan, bring to boil. Remove from heat and let the tea infuse the lemon juice for a few minutes.
  3. Measure the icing sugar in a mixing bowl. Add 60g lemon tea in the icing sugar (make sure the ratio is sugar:liquid = 5:1, some lemon juice might be lost during cooking, therefore prepare more than 60g lemon juice). Mix until all the sugar is incorporated and the mixture is thick and sticky.
  4. When the cake is ready, remove it from the pan and put it on a baking rack on top of a baking tray. Pour the icing on the cake and let it drip down to the sides. If some ares are not covered then use a palette knife to spread the icing. Only a thin layer is required to cover the cake.
  5. Put the cake in the oven for 20 minutes. The icing should dry out and a thin crust should cover the cake. (I did like the icing very much, I spread a thick layer of icing so my cake looked a bit white. Normally the wet and sticky icing make it difficult to store or transport a cake but this technique solves these problems – I love it!)img_4523img_4525

Strawberry and Coconut Cake

6 Jan

Strawberries are in season again! This year we have picked the biggest strawberries ever! They were juice and sweet.My 22 moth old daughter not only enjoyed running in the strawberry field but also enjoyed eating the delicious strawberries. 🙂

We have picked almost 3kg strawberries. Apart from eating fresh a great way to consume the strawberries is to use them in baking. This recipe is adopted from a magazine, but I bumped up the volume a little bit to make a thicker cake. Yes because I had too many strawberries! However I must say I was too generous on strawberries and also cut them in big pieces, so they sank to the bottom of the cake. You might cut down the amount of strawberries or cut them smaller. The cake was moist and fruity. The strawberry cream cheese icing was sweet and delicious. This cake brought the sunshine on the plate!

Strawberry and Coconut Cake

  • 150g butter, at room temperature
  • 1 cup caster sugar
  • 3 large eggs
  • 1½ cup plain flour
  • 1½ tsps baking powder
  • ½ tsp ground cardamom
  • ½ cup desiccated coconut
  • 1 cup plain yoghurt
  • finely grated zest 1 orange
  • 2 Tbsps orange juice
  • 18 medium strawberries, hulled and quartered

Strawberry Cream Cheese Icing

  • 150 g cream cheese, at room temperature
  • 100 g butter, at room temperature
  • 2 cups icing sugar, sifted
  • 3–4 strawberries, hulled and crushed with a fork
  1. Grease a 22cm springform cake tin and line the base and sides with baking paper.
  2. Preheat the oven to 170°C bake.
  3. Beat the butter and sugar until light and pale. Whisk the eggs together and gradually beat in until very well combined. Mix the flour, baking powder, cardamom and the coconut together. Gently fold into the butter mixture along with the buttermilk, orange zest and juice and the strawberries.
  4. Pour into the tin and smooth the top. Bake for about 1 hour until golden and the cake is pulling away from the sides of the tin. A skewer inserted into the centre should come out clean.
  5. Let the cake cool completely before removing from the tin.
  6. Icing: Beat the cream cheese until smooth, then add the butter and beat again until light and fluffy. Beat in the icing sugar. Beat in half the strawberries, then add enough of the remaining pulp to make a thick but spreadable icing. You may not need to add all the strawberry pulp.
  7. Spread over the cake and decorate with shredded coconut and fresh strawberries.

img_8861img_8856